> ## Documentation Index
> Fetch the complete documentation index at: https://valuemap.app/docs/llms.txt
> Use this file to discover all available pages before exploring further.
# Quickstart in 10 min
This guide walks you from a blank organization to your first submitted initiative in about 10 minutes. It covers the critical path only. Links to deeper guides are provided along the way.
**Before you begin**
You'll need a ValueMap account and an organization to work in. If you haven't set one up yet, navigate to Creating an Organization or Joining an Organization.
Navigate to your org page under **Workspace** in the left sidebar. This is your central workspace. You'll spend most of your time here. You'll see tabs for Overview, Portfolios, Products, and Initiatives across the top.
Everything in ValueMap lives inside a hierarchy: your org contains portfolios, portfolios contain products, and products contain initiatives. You'll need at least one portfolio and one product before you can create an initiative.
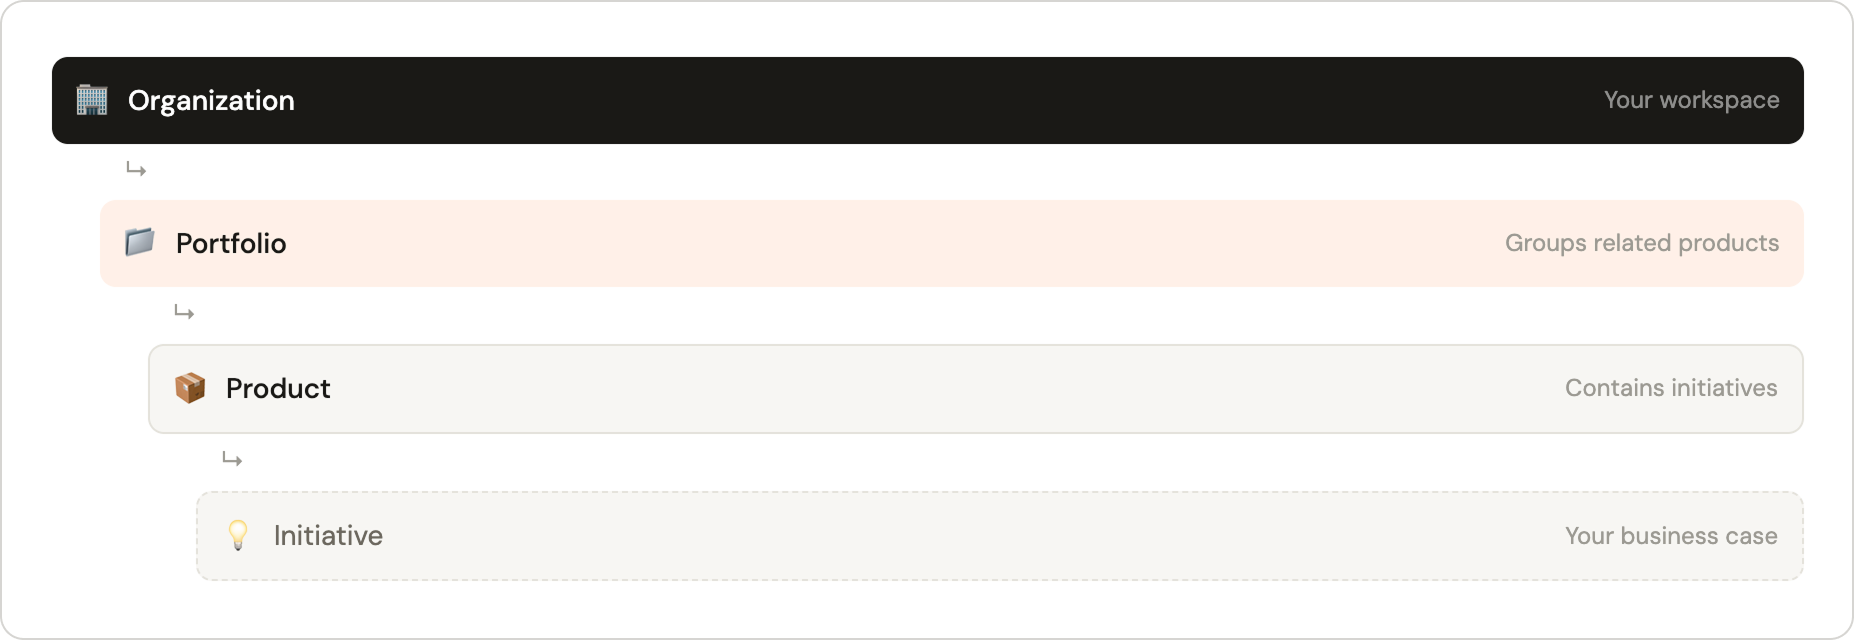
Go to Org page → Portfolios and click "+ Add a new portfolio". Give it a name (e.g., "Digital Transformation") and an optional description, then click Create. You can also add a portfolio by clicking on the overflow menu upon hovering over the Org item in the sidebar and clicking "+ Add a new portfolio".
Portfolios can only be created by **Super Admin** and **Admin** users.
Go to Org page → Products and click "+ Add a new product". Select the portfolio you just created, give the product a name (e.g., "Mobile App"), and click Create. You can also add a product by clicking on the overflow menu upon hovering over any Portfolio item in the sidebar and clicking "+ Add a new product".
Products can be created by **Portfolio Contributor,** **Super Admin** and **Admin** users.
Go to Org page → Initiatives and click "+ Add a new initiative". You can also add an initiative by clicking on the overflow menu upon hovering over any Product item in the sidebar and clicking "+ Add a new initiative". Fill in the required fields:
* **Name:** A clear, descriptive title for this business case.
* **Strategic theme:** Choose a theme from your org's configured options.
* **Portfolio:** Select the portfolio you just created.
* **Product:** Select the product you just created.
* **Start month:** When this initiative is expected to begin.
* **Risk level:** Low, Medium, or High.
Click Create Initiative. It will be created in Draft status.
Open your new initiative and click the Benefits tab. Click "+ Add benefit" → "Add new benefit" and fill in:
* **Benefit name:** E.g., "Uplift from efficiency savings"
* **Benefit type:** Select from your org's configured types.
* **Start month & Duration:** When the benefit starts and how long it runs.
* **Estimated benefit:** Enter a simple dollar value to start.
* **Benefit interval:** If recurring duration is selected, select either monthly or yearly
* **Confidence interval:** 10% is a reasonable default — creates a 90–110% range across scenarios.
Save the benefit. The Live Financial Summary panel on the right will update immediately.
Click the Costs tab. Click "+ Add cost" → "Add new cost" and fill in:
* **Cost name:** E.g., "Implementation cost"
* **Cost type:** CapEx or OpEx.
* **Start month & Duration:** When the cost is incurred.
* **Estimated cost:** Enter a simple dollar value.
* **Cost interval:** If recurring duration is selected, select either monthly or yearly
* **Contingency interval:** 10% is a reasonable default.
Save the cost. The Live Financial Summary panel on the right will update immediately.
Click the Overview tab of your initiative. You'll now see your key financial metrics populated:
* **Net present value:** The discounted value of your initiative over its lifetime.
* **Internal Rate of Return:** The annualized return rate — compare this to your org's WACC.
* **Payback Period:** How long until benefits cover costs.
The scenario selector defaults to Base. Switch between Conservative, Base, and Optimistic in the Live Financial Summary panel to see how the numbers shift by changing it in the Benefit or Cost tab.
When your initiative is ready for review, click Submit in the top-right of the initiative page. The status will change from Draft to Proposed. An Admin or Super Admin will then be able to approve it from the Approvals page, making it Active.
Once Active, you can begin recording actuals each month to track real performance against your projections.